 |
| Pop Up slider Card |
 |
| Pop Up slider Card |
Materials to make a Pop Up Slider Card
- Card Paper
- Craft Knife
- Pen or Scoring tool
- Ruler[ Scale]
- Glue
- Foam Tape or Double Sided Tape
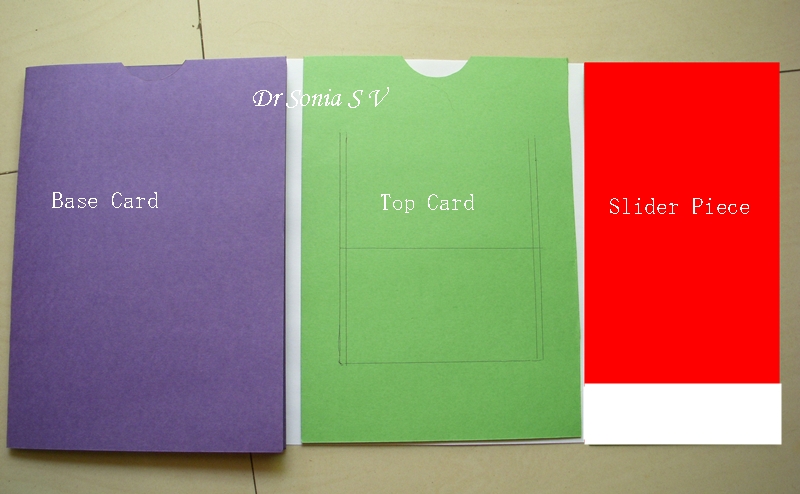
The Base Card shown here is a standard A 4 card folded in half - You need only half of the A4. I usually keep it folded as I use the Pop Up slider Card for the front of the Greeting Card and do more work on the inside of the card.
The Top Card is half of the A 4 card
The Slider Piece can vary in Size depending on your needs- Its size should be such that you have enough space to stick your top card to the base card and still get a smooth and sturdy sliding mechanism
 |
| Slider card Pieces |
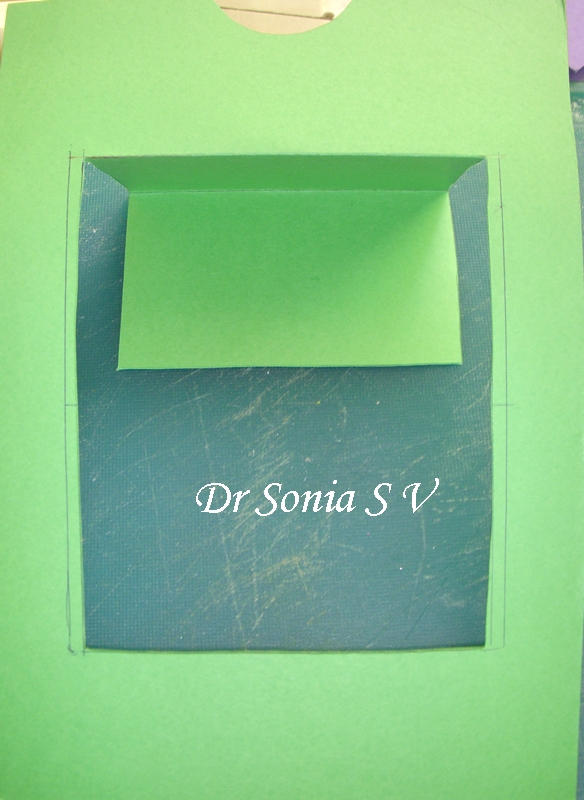
Place the Slider Piece on the back side of theTop card and lightly mark around the bottom, right and left sides.The Slider Piece can go low enough on the top card leaving enough space to glue the top card to the base
 |
| Slider Card |
The green dotted lines in the photo are the outlines of the slider piece. The parallel blue dotted lines within are the actual cut lines on the Top card. This makes your slider piece bigger than the slot on the Top card. I found it better to make the slider piece bigger or smaller than the Slot in the Top card as this gives a smooth sliding mechanism.
 |
| Slider Card Tutorial |
· This photo illustrates the score lines and cut lines for the Pop Up Slider Card. The red Dotted line can be made at the center of the rectangular area. The lower rectangle is the area which is going to eventually Pop in the sliding mechanism.
 |
| Slider Card Tutorial |
CCut along the Blue Dotted Lines with a craft knife. This gives a rectangular Flap of the Top card Be sure to keep the edges smooth as otherwise your sliding mechanism won’t be smooth.
 |
| Slider Card Tutorial |
· Fold up the lower rectangular half towards you. For those of my readers familiar with Origami, this means Valley fold the red dotted lines.
 |
| Slider Card Tutorial |
Fold the Upper Score line of the Rectangular flap away from you. [This means mountain fold at the top of the rectangular flap]
 |
| Slider Card Tutorial |
· Flip over this Top card piece and this is what you get.This photo shows the front of the Top card.
 |
| Slider Card Tutorial |
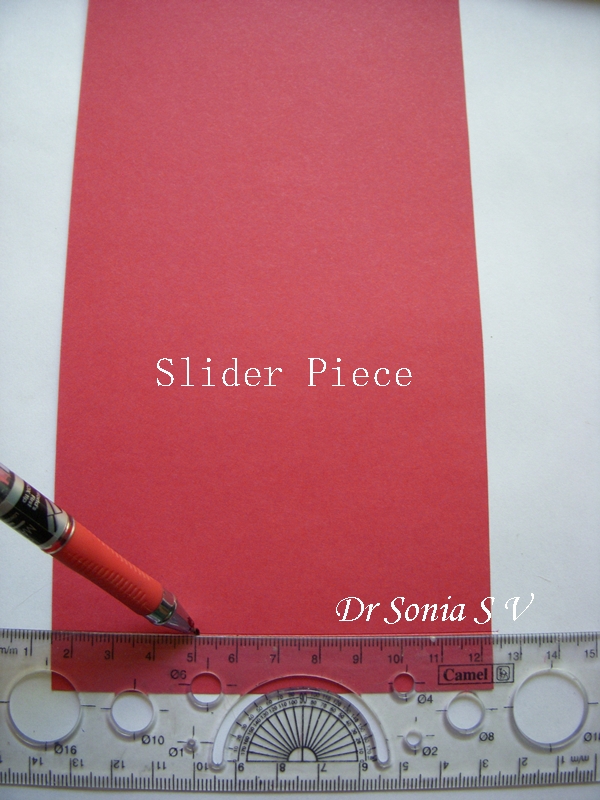
· Take the slider piece ,score and Fold around 1 cm of the bottom edge of this slider piece.
 |
| Slider Card Tutorial |
 |
| Slider Card Tutorial |
 |
| Slider Card Tutorial |
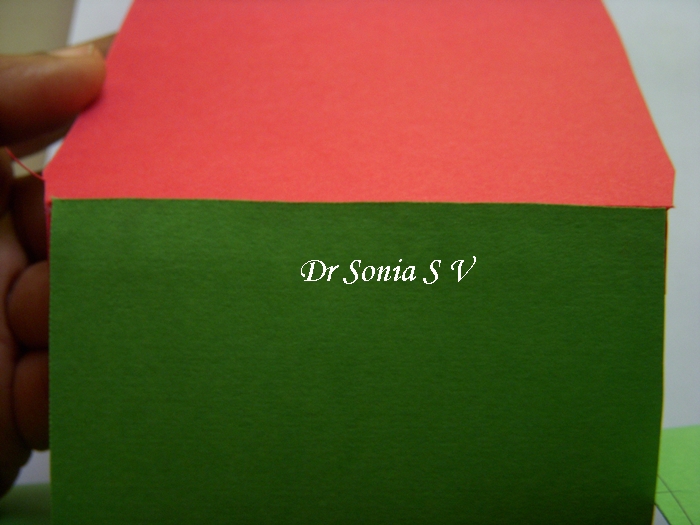
Glue this tab created on the Slider piece to the backside of the lower edge of the rectangular flap of the top card. This Creates the Slider Mechanism.
 |
| Slider Piece Of Slider Card Attachment |
 |
| Slider Card Assembly |
 |
| Pop Up Slider Card Assembly |
If you have made your Slider piece larger than the slot in the top card- snip off the extra slider piece at the lower part at the tab to create a smooth slider mechanism to the Pop up Card.
Your Slider Mechanism is ready.
 |
| Slider Card Tutorial |
 |
| Slider Card Making |
You can Chop off the excess slider piece from the top of the card after creating a pull tab with the top card piece in the flat position.
To Complete the card,stick the assembled Slider Piece- Top Card to the base card.I prefer to use thin Foam tape or Double Sided tape.This is fast, easy and non-messy! This is the part where my daughter chips in. She loves to tear of the Sticky tape!
The Tip at this stage is to keep the Attachment points of the top card to the base card well away from the slider mechanism so to give enough room for a smooth sliding action.
Your Pop Up Slider Card is ready. I have purposely not mentioned much measuring. This is one card which can be done offhand. You can make it as big or as small as you want. A good way to use up those nonstandard leftover card pieces.
 |
| Making a Pop Up slider Card |
 |
| Assembled Pop Up Slider Card |
Now enjoy embellishing your card - Quill it, Stamp it ,Place a Sticker,Photograph, use a 3 D Decoupage image, beads and baubles-- the possibilities are endless.
I was inspired to start making this Pop Up slider card using a Tutorial at : http://prickandstitch.ismycraft.com/cardmaking-projects/pop-up-slider-card-with-prick-and-stitch-train/
I hope my first tutorial is useful.Please Do key down your comments.
Examples of Pop up Slider Card
Pop Up Hamburger Card
Pop Up birthday Cake
Pop Up Slider Mechanism in a School Project

I want to try it! Seems fun to make )
ReplyDeleteThank you ..its a fun and easy card to make and especially a big hit with children
Delete