 |
| Christmas Diorama |
Dear friends, my 7 year old daughter is rather taken with beads these days and is forever making necklaces and bracelets [see her
Beaded Necklace]..I caught the beading fever from her and tried to make a
beaded tree using some seed beads I have had like since forever!
 |
| Beaded Tree Tutorial |
My beaded tree is rather amateurish so professional beading experts do forgive me but I was so thrilled my experiment turned out ok that I am sharing the tutorial so that a novice with no beading experience whatsoever can make a beaded tree
How to make a beaded tree
This beaded tree is quite simple and quick to put together ! Some of the leafy branches were made by my 7 year old and it took just approximately 1 hour to make the unadorned beaded tree!
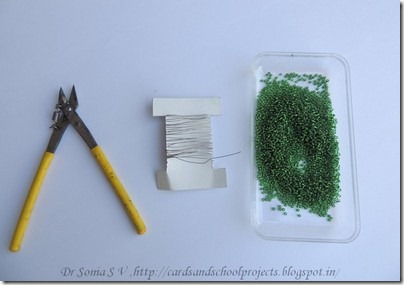
Materials required for your DIY beaded tree
 |
| Beaded Tree Tutorial |
- Seed Beads –whatever colour you want your tree to be
- Wire -24 G or even thicker ones [of less gauge]– I worked with 24 G and it was quite easy to twist and bend.
- Wire cutter or scissors.
 |
| Beaded Tree Tutorial |
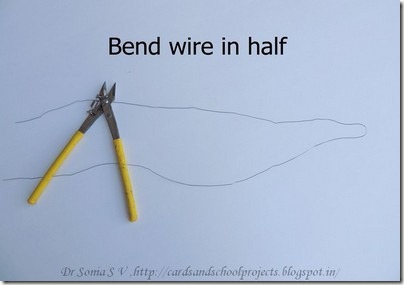
Cut a piece of wire 16- 20 inches long[I didn't measure … I just cut wire of length from my fingers to my shoulder!] and bend it in half
 |
| Beaded Tree Tutorial |
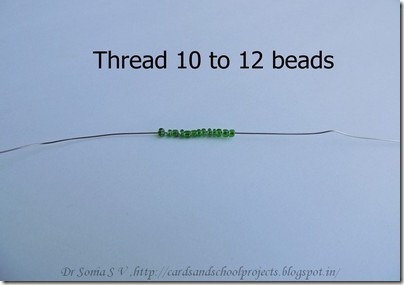
Thread 10 to 12 seed beads on the wire.. you don't have to count but eyeball the length of the beaded area.The commonly available seed beads [unless you buy high quality expensive ones] generally vary in length in one packet and if you thread the same number of beads the length will vary .
 |
| Beaded Tree Tutorial |
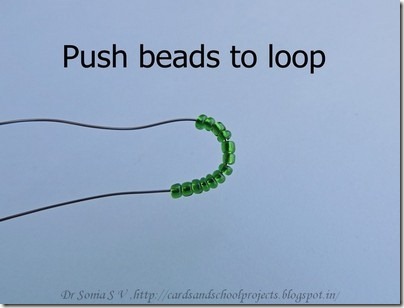
Push the beads to the bent center of the wire
 |
| Beaded Tree Tutorial |
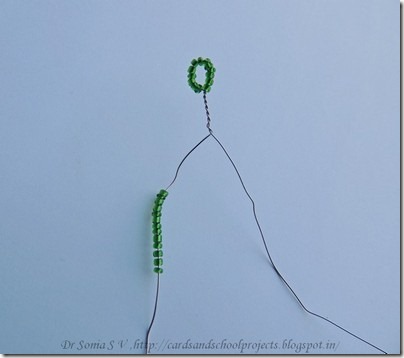
Cross the wires and twist to form a loop of the seed beads.Keep twisting to give the beaded “leaf” a stem. Make your stem as long as you want.
Tip: To quickly and easily twist -hold the beads and twist rather than holding the wire and twisting
 |
| Beaded Tree Tutorial |
Thread beads in the same way on one arm of the wire
 |
| Beaded Leaf Tutorial |
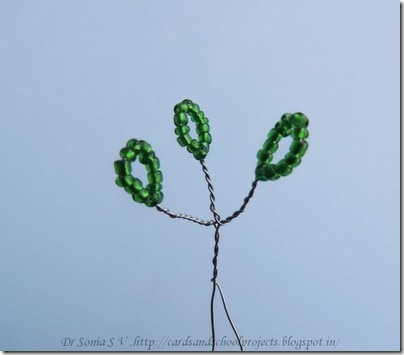
Bend the wire at the length you want the leaf to branch out and holding the beads in your hand twist to form a looped leaf like before.Keep twisting till the wire reaches the earlier leaf’s stem.
 |
| Beaded Leaf Tutorial |
Thread beads on the other half of the wire in the same way and twist to make one more beaded leaf
 |
| Beaded Leaf Tutorial |
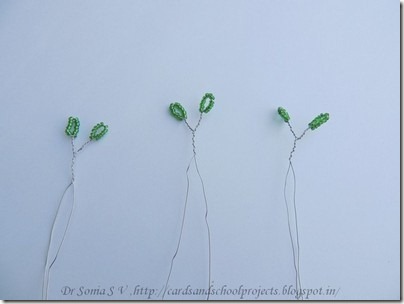
Twist the 2 arms of the wire to a length you want . If you want add more leaves on each arm of the wire as before.
 |
| Beaded Leaf Tutorial |
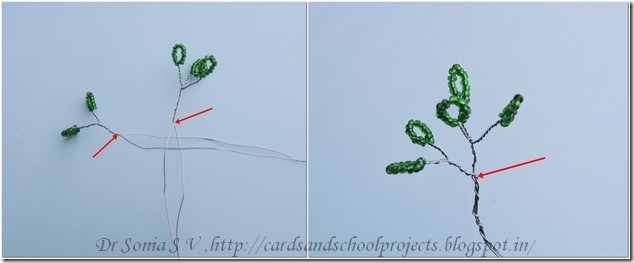
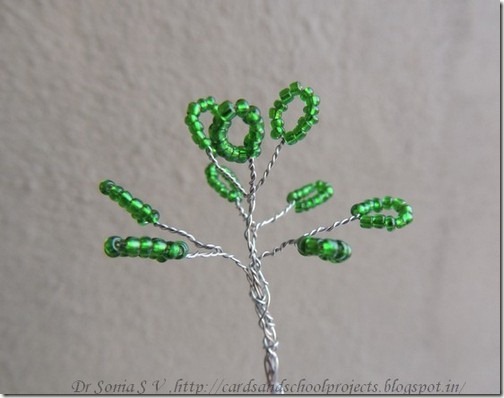
You can make a conical “Christmas tree” type of tree by adding leafy branches of different stem lengths and having different number of leaves.You can make three or four “2 leaf” branches and add them to your 3 leaved top branch.
 |
| Beaded tree Tutorial |
Decide how much down the top branch you want the next layer of branches and twist on the leafy branches one by one .
 |
| Beaded Tree Tutorial |
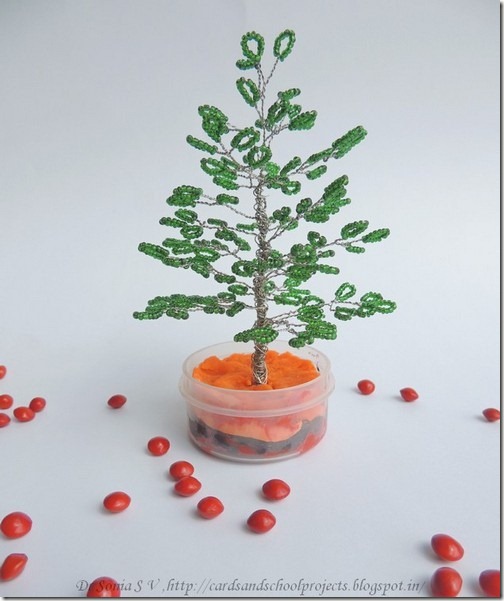
So your tree is already shaping up! Add branches with more leaves or longer stems as you go down the tree trunk.There is no hard and fast rule on lengths and number of leaves on how to make your tree..I experimented quite a bit and my tree turned out different every time and it was fun!
 |
| Beaded Christmas Tree |
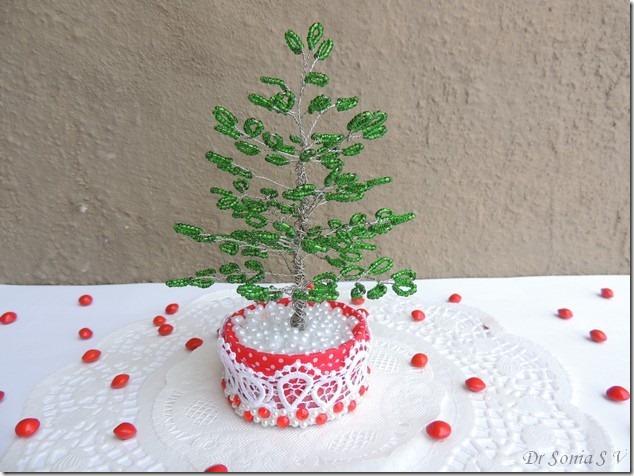
You can make a loopy base for your tree with wire [rather tricky !] or insert your tree trunk in play dough/clay like I have done here.
 |
| Beaded Christmas Tree |
The base of my beaded tree is a plastic play dough container which I dressed up with washi tape, lace and rhinestones.To cover up the play dough I poured a generous amount of white glue over it and covered it with pearls.Can you see the "snow" on the rim of my tree base?
|
 |
| Beaded Christmas tree |
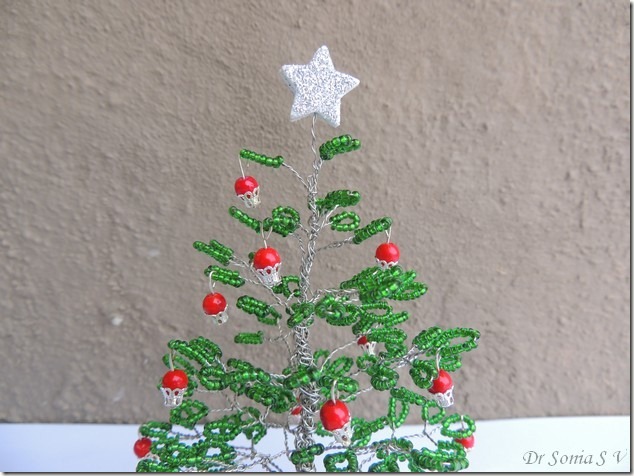
Threaded a flower head and a red bead on a pin head and looped them on my beaded tree.I don't know if they look like cherries or Christmas tree ornaments!
Die cut 2 stars from silver glittery foam and stuck a loop of wire between them.Twisted the star atop the beaded Christmas tree.
 |
| DIY Beaded Tree |
Click here for the full view and details of the snowy
Christmas Diorama I used the beaded trees on .
 |
| Beaded tree tutorial |
These easy to make Trees would look fabulous as home decor and if you sell your crafts I bet these would be a big hit [but caution you need to pack them well and maybe use thicker wire otherwise the branches can get squished!]
Do tell me how this simple tutorial was.
Supplies :
Beads, Wire , wire cutter,head pins, flower caps,pearls,Rhinestones-Itsy Bitsy.
Edited : This beaded tree tutorial was featured at
Totally Tutorials!

This beaded tree also got Top honor at
Decorate to Celebrate Christmas tree theme




absolutely gorgeous Project, Sonia. When you explain with pictures, its more easier. :)
ReplyDeleteThank you so much Shilpa..I am still debating with myself whether you tube videos would be better for tutorials...I personally cant sit through a you tube video!
DeleteIts so wonderful Dr Sonia... lovely Christmas tree.. Thanks for detailed pictorial..you are amazing.. :)
ReplyDeleteRadhika you are one amazing crafter yourself..I am always stunned at the ideas you come up with!
DeleteI like the idea of using the bead caps to hold the cherries!! Waiting to see the complete project. I don't think I have the patience to make a branch with seed beads & here I alread see two tress doc :-)
ReplyDeleteTanvi it was quite easy..in fact much easier than quilling!
DeleteWow Sonia, isn't this so unique and pretty...love that Christmas tree, you are so inspiring with lots of talents.... love it!
ReplyDeleteOooh Thank you so much Shirl. And I am the one always drooling over your projects!
DeleteLovely beaded tree Dr. Your lovely beaded tree reminds me of a small beaded tree which I made out of compulsion because one of my rosaries broke . You always inspire me Dr.Thank you very much.
ReplyDeleteThank you so much Ghazala..would love to see your tree..have you posted it on your blog?
DeleteLovely ! I`m off to make one and gift it to my neice. She`s going to love it !
ReplyDeleteThank you so much ...that is praise indeed coming from you
DeleteLovely tree..Love the hanging red beads...Thanks for the tutorial..
ReplyDeleteThank you so much Sindhu ..yeah the beads look like cherries in a basket!
DeleteI think that the tree is adorable..I have loved christmas trees ever since I was a kid and miss them in apartments
ReplyDeleteThank you so much Divya..this year I have a real Christmas tree in my garden and my daughter is eagerly waiting to deck it up!
DeleteFantastic Christmas tree n tutorial too ! The red berries look wow on green tree :D ! I am eager to see the diorama ..
ReplyDeletePooja will soon share the diorama..I didnt want to make the blog ost too long
Deletevery beautiful tree.... for me the christmas season has set in seeing the preps on ur blog!
ReplyDelete:)
Oh you are so sweet Bijal.Somehow Christmas is one festival I always celebrate though I am a Hindu!
DeleteDr, I must say u have done a mind blowing work....Its superb....
ReplyDeleteThank you so much for such sweet words Kunda.I felt especially proud as I used to think beading was "difficult"!
DeleteWell Hello Dr. Sonia. It has been a while since I popped in for a visit. You have been busy creating beautiful projects and this beaded tree is so very pretty. I love the way the twisted silver wire shows in the tree. Makes it looks very artsy. Your daughter is growing up too fast, but I am glad you two are still sharing the love of crafting.
ReplyDeleteLinda Thank you so much for dropping by ..yes my daughter is growing up fast!!!
Deletevery very beautiful , fixing the tree with the help of clay is a great idea !!looking forward to the complete Diaroma, Sonia !! I can see beautiful snow under your second tree !!
ReplyDeleteThank you so much Suman ..yes the diorama is completely snowladden!
Deletethis is so creative and pretty thank you for joining challenge at dtc. hugs
ReplyDeleteThank you so much Rhonda I love your challenges
DeleteThis is so beautiful!! Loved the red beads on the tree, they are making it look more beautiful! Thanks for sharing the tutorial! :)
ReplyDeleteWaiting for the Christmas diorama! :)
Thank you so much Ayushi.I wanted red crystals but couldnt get them anywhere.The red beads are from a broken necklace
DeleteAbsolutely adorable!
ReplyDeleteThanks for sharing!
Hugs!
Thank you so much Nagela
DeleteI just love this darling little tree! What time and skill it must have taken to make it!
ReplyDeletePam
scrap-n-sewgranny.blogspot.com
Oh wow, this is so gorgeous, Sonia!! What a creative idea!! It looks absolutely amazing!! Thank you so much for linking up at Decorate to Celebrate!! Have a great weekend :)
ReplyDeleteLisa
A Mermaid's Crafts
This is incredible -- you are amazing Sonia.
ReplyDeletethis would be great in the DL.ART Thankful Thursday Anything Goes December Linky Party. Have a great day
DIANA L.
dianamlarson.blogspot.com
This is absolutely brilliant, Dr. Sonia. Thanks so much for showing the step by step instructions.
ReplyDeleteWow! What a great idea... Its really an unique craft.... I love it so much.. Its great post for Christmas season..
ReplyDeleteSo adorable Sonia and just love the little scene you created..what a fabulous and clever idea..
ReplyDeleteluv CHRISSYxx
That is very cool. I love how it turned out. I've never done any beading but now I want to try
ReplyDeleteThank you so much for doing this beaded Christmas tree. I had the instructions on how to do and lost them So thanks again for sharing this tutorial. I'm going to make these.
ReplyDeleteHugs, Patricia
WOW!! This is gorgeous!!! Thanks for sharing how you made it as well!
ReplyDeleteAwesome job!!!
Wow! No words! The Tree is Beautiful Sonia!
ReplyDeleteOh my goodness... this is the most precious Christmas tree I've seen! Your talent is a joy and a delight to all! :o) I hope you have a beautiful weekend. :o)
ReplyDeleteHugs and blessings!
So beautiful.. thanks for the tutorial :)
ReplyDeleteVery Beautiful Tree! Thanks for entering the challenge!
ReplyDeleteWOW! What a fabulous project! Thanks so much for the tutorial! Fantastic! Thanks so much for joining us at The Sisterhood’s ‘HANDMADE’ challenge and please come back again soon!
ReplyDeleteDarlene
one of the 'Sistahs'
The Sisterhood of Crafters
DAR’S CRAFTY CREATIONS
I have long been an admirer of yours, Dr.Sonia! I greatly love the fact that you manage to find time for crafting in your obviously packed schedule. I would like to try the beaded tree some day...
ReplyDeleteSuch a lovely idea!
ReplyDeletethank you for sharing with us at TIOT your inovative, creative tree.EE
ReplyDeleteAmazing tree!Well done1
ReplyDeleteI'm your new follower!
hugs from Greece
This is so beautiful...nicely explained!
ReplyDeletedevika
http://craftncreativity.blogspot.in
Wow one of the most easily understood tutorials Dr ! :)
ReplyDeleteI still cant believe ur a doc :D u are so good at this !
thanks for playing with us at BGC - Dec challenge !
Hugs !
Hello Dr. Sonia:) It's been a while since I've stopped by but I was glad to see your entry over at Decorate to Celebrate:) Your tree is simply amazing and so beautiful. Thank you for joining us over at Decorate to Celebrate.
ReplyDeleteHugs,
Norma
Wow such a simple idea, but so gorgeous when done! You must have a lot of patience with all that beading!
ReplyDeleteThanks for sharing with us
Lin
Dream Valley
I know there is a new challenge at TIOT already, but somehow time just slips through my fingers at the moment, so I am catching up a little on the commenting...
ReplyDeleteLOVE your little beaded tree, must have been a lot of work, I think I am too impatient to make this...
thanks for joining us at TIOT
xxx Ellie Knol xxx
Thanks for joining us at Miriam's Crafting blog for our monthly challenge! The tree is so great. I will definitely have to try this one. I have been meaning to get some wire, and now I have another reason. Just to let you know, I am having a DT call, in case you're interested.
ReplyDeleteThis is so sweet. Thank you for sharing it. Marion x
ReplyDeleteOh wow, Dr Sonia, this is just amazing love the little ornaments you hung on the tree.....again a beautiful tutorial.
ReplyDeleteU amaze me always Sonia ji
ReplyDeleteThanks for playing with us at BGC #44 - 3D gift challenge
Hugs
Pooja
Wow! Fabulous project! Love the tree, cherries hanging and your tutorial . Thanks for playing along with us at BGC :)
ReplyDeleteAmazing tutorial and amazing tree!!!
ReplyDeleteWAW! I'm speechless :). Nice work.
ReplyDeleteGreetings from Slovenia
Jerneja